Before we jump into the code, let’s first understand templates and why React is useful for creating them.
Email templates are previously created content with placeholders for specific information such as the contact’s name or relevant personal details that is added at the time of email sending. An example could be a personalized reminder for clients to book an appointment with a specific health provider they previously visited.
Email templates optimize the workflow for sending emails to many individuals by using a structured format that can be modified and customized for specific use cases. Using templates is important because they are reusable components you can personalize for each user. Using templates allows you to scale your marketing program by leveraging concepts from React.
React is a popular JavaScript framework for building user interfaces such as web and mobile applications. Using React allows you to create components that can be used across user touch points, such as the browser and email clients. This way, you can share the same design language and layout across different communication channels with your users. One possible challenge is handling cases where email clients need more JavaScript support and render HTML inconsistently. We will touch on this more shortly!
In this section, we discussed what are email templates and the benefits of using React to create email templates.
Getting started:
Before jumping in and coding, let’s setup our environment.
To start with React, check out the React documentation to Start a New React Project. We will be building the email templates using react.email library that has support for most email clients. There are two approaches to getting started:
Add react.email to an existing React project by running: npm install react-email
Note that you will need to add individual components or functionality as you use them, so using the HTML component requires that you install npm install @react-email/html
If you are starting from scratch and want to try out react.email, run npx create-email@latest to create a new React project with examples React email templates in the folder react-email-starter
In this section, we reviewed the environment setup for creating email templates.
Building the email template with React:
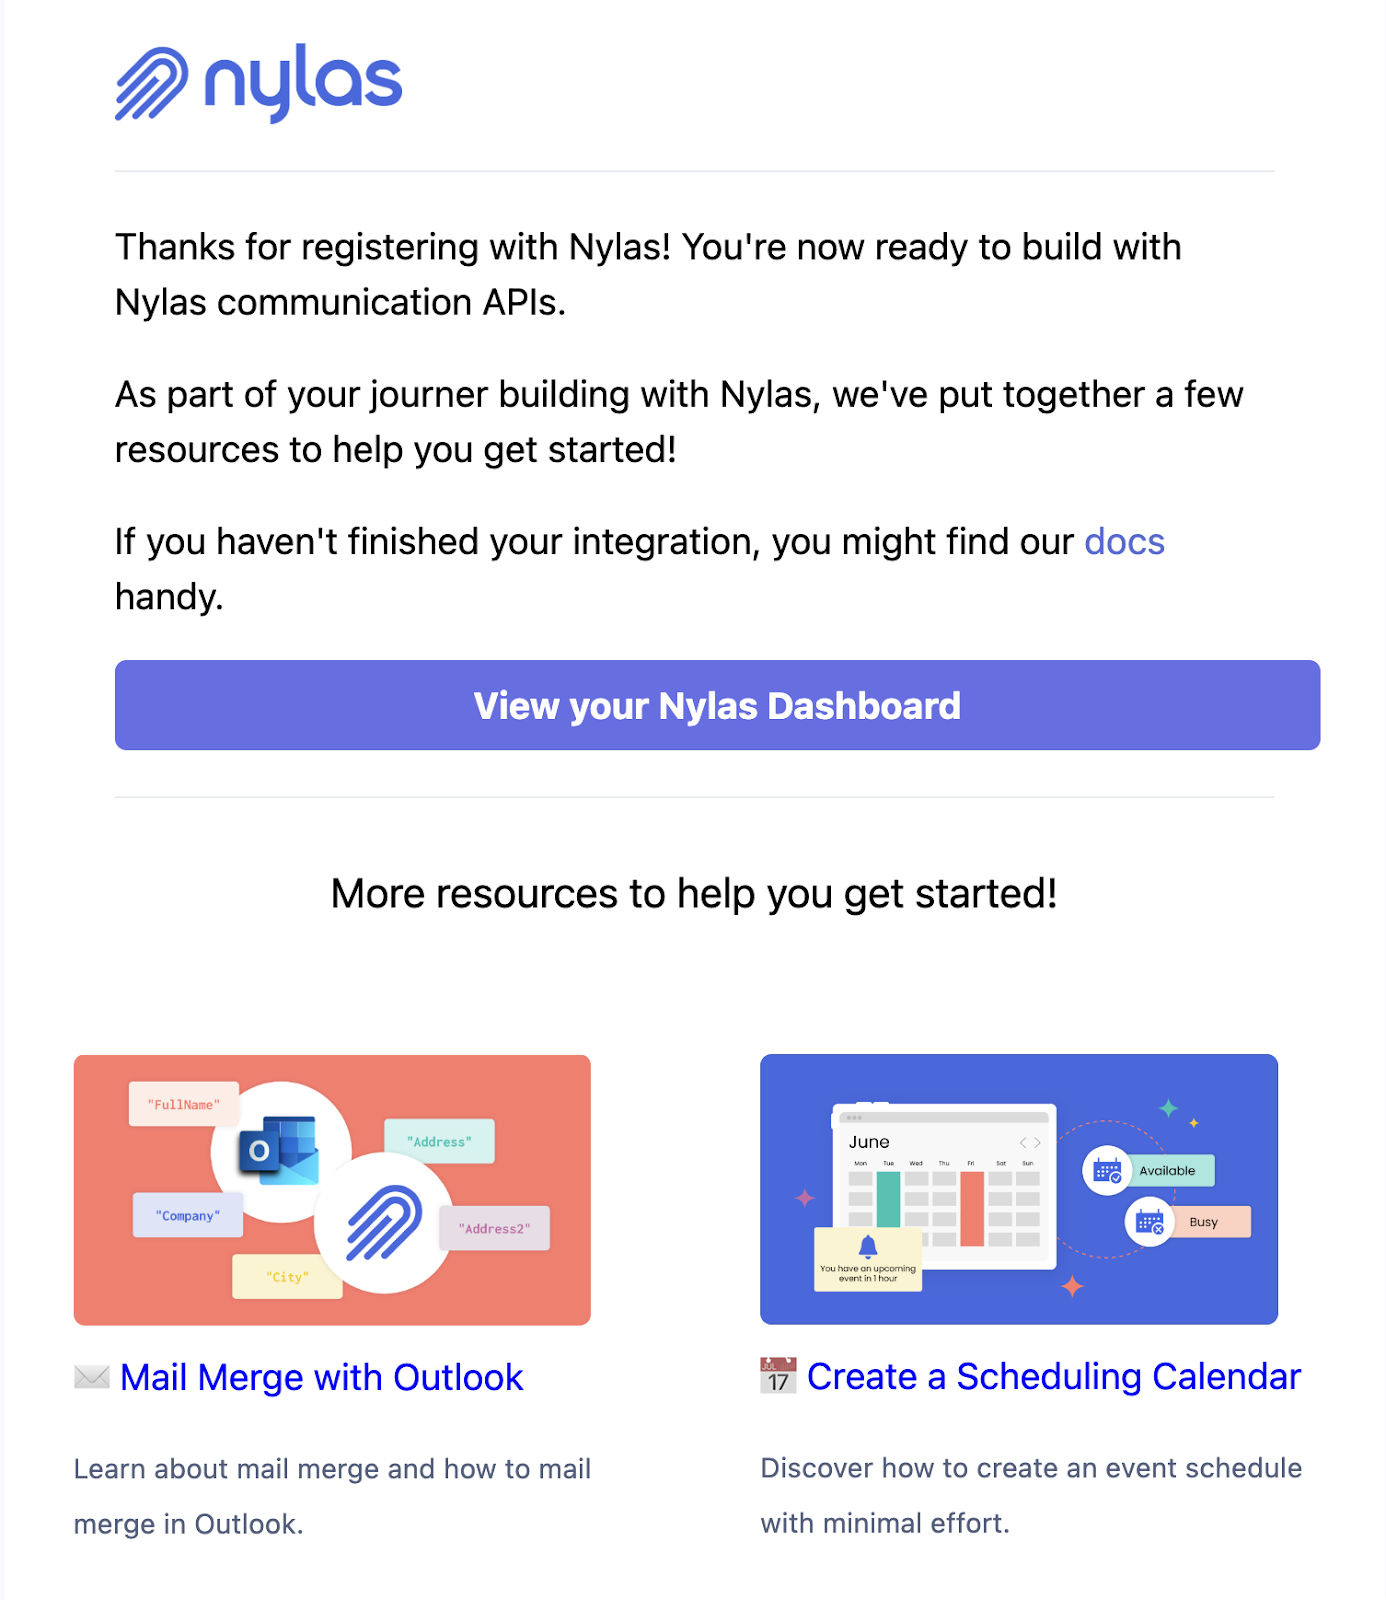
Let’s build a Nylas newsletter sharing popular content for our template. We will include a description, live stream links, and blog posts. Here is an example of what we are going to build out:
Here is what the code looks like using react.email:
export const NylasDevNewsletter = ({
  username = 'Ram',
  intergrationComplete = false,
  additionalResources = [
    {
      title: '✉️ Mail Merge with Outlook',
      description: 'Learn about mail merge and how to mail merge in Outlook.',
      image: 'https://www.nylas.com/wp-content/uploads/Mail-Merge-with-Outlook.png',
      link: 'https://www.nylas.com/blog/how-to-mail-merge-in-outlook-step-by-step/'
    },
    {
      title: '???? Create a Scheduling Calendar',
      description: 'Discover how to create an event schedule with minimal effort.',
      image: 'https://www.nylas.com/wp-content/uploads/2023_Nylas-Scheduler-The-easiest-way-to-organize-your-events-1024x536.png',
      link: 'https://www.nylas.com/blog/how-to-create-a-scheduling-calendar-to-organize-events-dev/'
    }
  ],
  showNylasDashboardButton = true,
}) => (
 <Html>
   <Head />
   <Preview>You're now ready to build with Nylas!</Preview>
   <Tailwind>
   <Body style={main}>
     <Container style={container}>
       <Section style={box}>
          <Img
            src={`${baseUrl}/static/nylas-logo.png`}
            width="125"
            alt="Nylas logo"
          />
          <Hr style={hr} />
          <Text style={paragraph}>
            Thanks {username} for registering with Nylas! You're now ready to build with Nylas communication APIs.
          </Text>
          {
            additionalResources.length > 0 &&
            <Text style={paragraph}>
              As part of your journer building with Nylas, we've put together a few resources to help you get started!
            </Text>
          }
          {
            intergrationComplete && (
              <Text style={paragraph}>
                If you haven't finished your integration, you might find our{' '}
                <Link style={anchor} href="https://developer.nylas.com/">
                  docs
                </Link>{' '}
                handy.
              </Text>
            )
          }
          { showNylasDashboardButton && (
            <>
              <Button
              pX={10}
              pY={10}
              style={button}
              href="https://dashboard-v3.nylas.com/login"
              >
              View your Nylas Dashboard
              </Button>
              <Hr style={hr} />
            </>
          )}
          <Heading className="text-black text-[18px] font-normal text-center p-0 my-[30px] mx-0">
                More resources to help you get started!
          </Heading>
         </Section>

         <Section>
            {
              additionalResources.map((resource) => (
                <Column style={{ padding: '20px' }}>
                  <Img src={resource.image} alt={resource.title} style={contentImage}/>
                  <Link style={paragraphContent} href={resource.link}>{resource.title}</Link>
                  <Text style={descriptionContent}>{resource.description}</Text>
                </Column>
              ))
            }
         </Section>

     </Container>
   </Body>
   </Tailwind>
 </Html>
);

export default NylasDevNewsletter;
In the above example, we’ve provided a few configuration options for modifying the component with:
Username
Conditionarenderwing sections if additional resources exist and the user has integrated with Nylas
In this section we built code for building a component.
Building and editing the React email template:
We can load the template in the browser using the react.email command email dev that will render the components in a browser environment:
This sandbox environment allows you to iterate and modify the selected layout. You can add and update the template to use different react.email components like <Heading/>, <Image/> and <Columns/> that are supported by email clients.
This section looked at building React email templates using the react.email sandbox environment.
Sending React template emails
Here is a frontend code for sending React template emails using the Nylas Email API:
// frontend sendEmail function using react-email/render and NylasDevNewsletter

import { render as EmailRender } from '@react-email/render';
import NylasDevNewsletter
 from 'emails/nylas-dev-newsletter.tsx';

// call sendEmail function with NylasDevNewsletter rendered

const sendEmail = async ({ userId, to, body }) => {
    const newsletter = (<NylasDevNewsletter username={username} integrationComplete={integrationComplete}/>
    try {
      const url = nylas.serverBaseUrl + '/nylas/send-email';

      const res = await fetch(url, {
        method: 'POST',
        headers: {
          Authorization: userId,
          'Content-Type': 'application/json',
        },
        body: JSON.stringify({ , to, subject, body: EmailRender(newsletter) }),
      });

      if (!res.ok) {
        setToastNotification('error');
        throw new Error(res.statusText);
      }

      const data = await res.json();

      return data;
    } catch (error) {
      console.warn(`Error sending emails:`, error);
      setToastNotification('error');

      return false;
    }
  };
One important item to note for sending a React component via emails is that we need to convert the component to HTML, and we can do this using the render (@react-email/render) function provide by react.email. In the above example, we are rendering the component and attaching it to the body of the email.
Here the backend code for sending React template emails using the Nylas Email API:
In this section we went over the frontend and backend code for sending email templates.
Build time!
In this blog post, we reviewed how to create React Email Templates using react.email and send them using the Nylas Email API. We’ve previously covered a similar topic in our weekly Coding with Nylas live streams, where we talked about How to Mail Merge using React Templates:
 Email and Contacts API
  Calendar API & Scheduler
  Notetaker API
  Agent Accounts