Introduction
Authenticating users with Google in a Next.js application is common, but what if we need to do more than authenticating the user? For example, consider integrating Email and Calendar functionality using Google Auth Supabase. This means dealing with a new user flow and requesting permissions for additional scopes.
In this post, we’ll show how to use Google Supabase Auth to handle the initial user authentication and then pass that user’s Google refresh token to Nylas creating a grant to access the user’s Email and Calendar data. This approach allows us to seamlessly build Email and Calendar functionality.
Prerequisites
Here are the prerequisites to get started, we will provide further details and links for each step:
- Familiarity with Next.js and server-side routes
- A Supabase project with Auth configured
- A Next.js Supabase Google Auth setup or basic familiarity with Supabase OAuth flow
- A Nylas account and API Key
- A configured Google Cloud OAuth 2.0 client with the required Email or Calendar scopes
Google Project & OAuth Scopes Setup
We’ve covered how to set up a Google Project for Next.js Supabase Google Auth, below is a general outline of what is required:
- Create a new project in the Google Cloud Console
- Enable the Gmail and Calendar APIs
- Configure the OAuth consent screen and credentials
- Ensure the scopes (example of email scopes) required by the application are specified
- Make sure these scopes align with the request in Supabase and are required by Nylas (shown in the next section)
Supabase Initial OAuth Setup
To set up OAuth using Supabase Google Auth, let’s use server-side authentication using Next.js. Supabase covers all the steps to set up server-side auth using Next.js. We need to install the Supabase client in a Next.js application.
One change to consider to simplify testing Next.js Supabase Google Auth is adding a Log in with Google Button on the login page:
// src/app/login/page.tsx
export default function LoginPage() {
  return (
    <form>
      <button formAction={login}>Log in with Google</button>
    </form>
  )
}
As a sanity check before continuing, ensure the app can authenticate a user and check the user is authenticated via the Supabase dashboard:

Requesting Offline Access & Custom Scopes with Supabase
By default, Google Auth Supabase returns a limited set of tokens. To get a provider_refresh_token, we need to add the following query parameters:
access_type: 'offline‘prompt: 'consent‘
Also, add the custom scopes required for Email and Calendar operations. Ensure the scopes are part of the Google Project setup.
For example, in src/app/login/actions.ts:
// src/app/login/actions.ts
const { data, error } = await supabase.auth.signInWithOAuth({
    provider: 'google',
    options: {
      redirectTo: 'http://localhost:3000/auth/callback',
      scopes: "https://www.googleapis.com/auth/gmail.modify https://www.googleapis.com/auth/gmail.send https://www.googleapis.com/auth/calendar https://www.googleapis.com/auth/calendar.events https://www.googleapis.com/auth/gmail.compose https://www.googleapis.com/auth/gmail.labels https://www.googleapis.com/auth/gmail.readonly https://www.googleapis.com/auth/calendar.events.readonly",
      queryParams: {
        access_type: 'offline',
        prompt: 'consent'
      },
    },
  })
Now the user will be redirected to Google to complete authentication and accept all the scopes listed.
OAuth Callback Handling & Refresh Token Retrieval
After this step, upon successful sign-in, in the auth/callback route, finalize the authentication and for now just print the provider_refresh_token:
// src/app/auth/callback/route.ts
const { data, error } = await supabase.auth.exchangeCodeForSession(code)
const { data: sessionData, error: sessionError } = await supabase.auth.getSession()

console.log('Google (provider) refresh token:', sessionData.session?.provider_refresh_token)
Now we have completed user authentication with Supabase Google Auth. At this point, we have a valid refresh token from Google, ready to be passed to Nylas.
Introduction to Nylas Custom Authentication
Nylas provides a convenient way to access Email and Calendar data with a provider refresh token via Custom authentication. By providing the provider_refresh_token to Nylas, we can create a user grant that authorizes Nylas to access the user’s email and calendar data.
In the upcoming sections, we will look at how to use the provider_refresh_token to create a grantId.
Nylas Custom Authentication: Testing via Postman
Optionally, before integrating Nylas Custom Authentication, consider testing using the /v3/connect/custom endpoint in Postman:
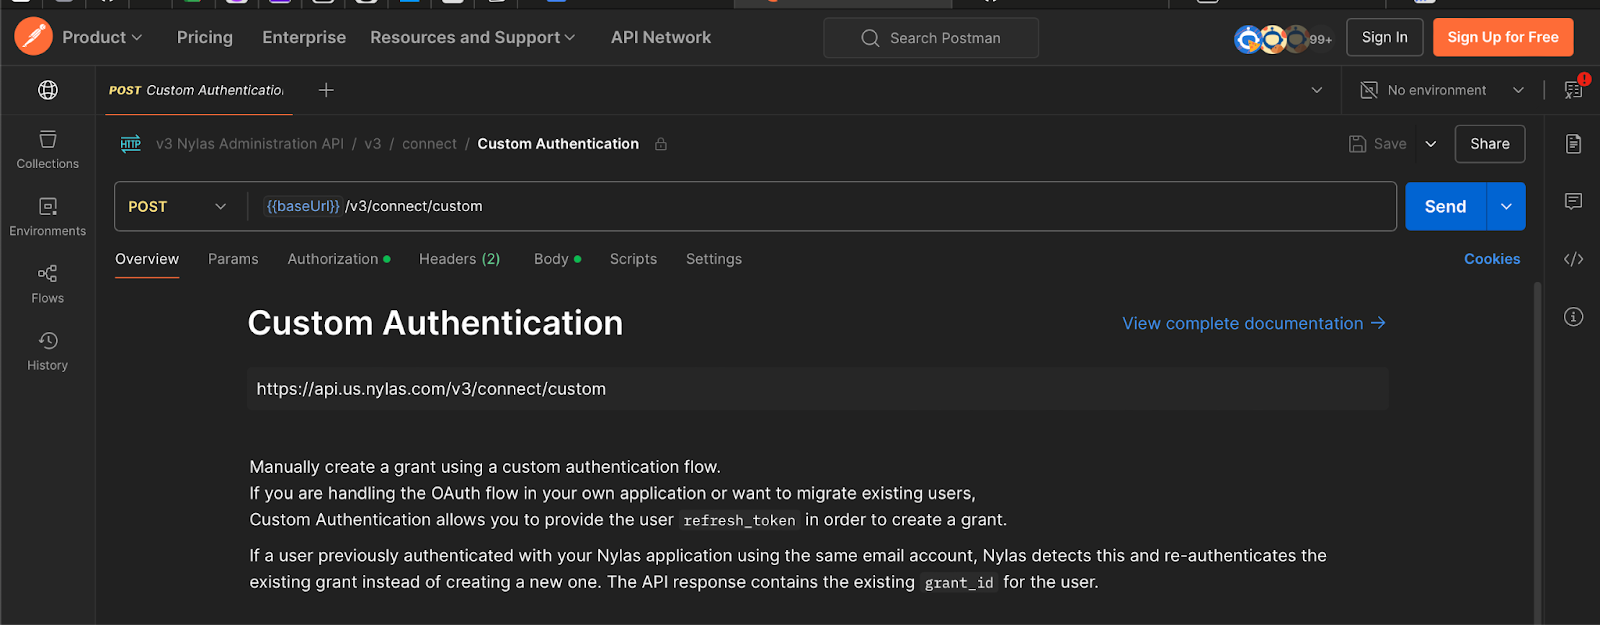
Check out our latest docs on how to get started with Nylas on Postman. The steps are as follows:
- Ensure all Nylas environment variables are added to the Nylas Postman collection
- Send a
POST request to https://api.us.nylas.com/v3/connect/custom
- Provide the
refresh_token and required scopes in the JSON body
- On success, receive a Nylas grant ID
Ensuring this step works independently will rule out configuration issues with Nylas before moving forward.
Integrating Nylas Auth in the Next.js Callback
Now that we’ve confirmed Next.js Supabase Google Auth and Nylas separately, it’s time to combine them. In the same auth/callback route, after we get the provider_refresh_token from Supabase, complete Nylas custom authentication using the Nylas Node SDK:
// src/app/auth/callback/route.ts
try {
  const response = await nylas.auth.customAuthentication({
  requestBody: {
    provider: "google",
    settings: {
      "refresh_token": `${sessionData.session?.provider_refresh_token}`,
    },
    scope: ["https://www.googleapis.com/auth/gmail.modify",
      "https://www.googleapis.com/auth/gmail.send",
      "https://www.googleapis.com/auth/calendar",
      "https://www.googleapis.com/auth/calendar.events",
      "https://www.googleapis.com/auth/gmail.compose",
      "https://www.googleapis.com/auth/gmail.labels",
       "https://www.googleapis.com/auth/gmail.readonly",
       "https://www.googleapis.com/auth/calendar.events.readonly"],
      }
    })

  console.log('Nylas grantId:',response.data.id)
If successful, we will see a response with the user’s Nylas grantId. Now we can use the Nylas APIS to access the user’s Email and Calendar data. Check out our docs to see how you can use the Nylas APIs.
Build Time
We’ve integrated two complex flows: Supabase Google Auth for initial Google OAuth and Nylas for extended Email and Calendar permissions. Chaining these steps creates a seamless experience for the user—one login sequence grants both standard authentication and advanced email/calendar operations.
Sign up for Nylas for free and start building! Continue building with Nylas by exploring different quickstart guides or by visiting our developer documentation.
 Email and Contacts API
  Calendar API & Scheduler
  Notetaker API
  Agent Accounts


