 Email API
 Calendar API
 Contacts API
  Scheduler
 Notetaker API
 Google email & calendar integration
 IMAP integration
 Zoom integration
 Inspiration gallery
Jump to section

Jump to section
Introduction
AI‑powered coding tools are transforming software development, shifting day‑to‑day work toward prompt‑driven development. Most IDEs (Integrated Development Environments) come with assistants that generate code, suggest fixes, and scaffold projects using natural‑language prompts.
Consider launching a fully‑functional Customer Relationship Management (CRM) feature in days. In this guide we pair Lovable—an AI-powered app development platform with a CRM Dashboard template—and the Nylas APIs that power email, contacts, and scheduling without wrestling with OAuth configurations for every provider. We’ve previously covered how to build a CRM using Replit AI Agent.
Whether you’re a solo dev, a startup founder, or part of a small team, this post shows how to streamline CRM feature development and ship faster.
What Is Lovable?
Lovable uses user prompts to generate working code. Describe what you want and it generates React UIs, API routes, and database migrations:
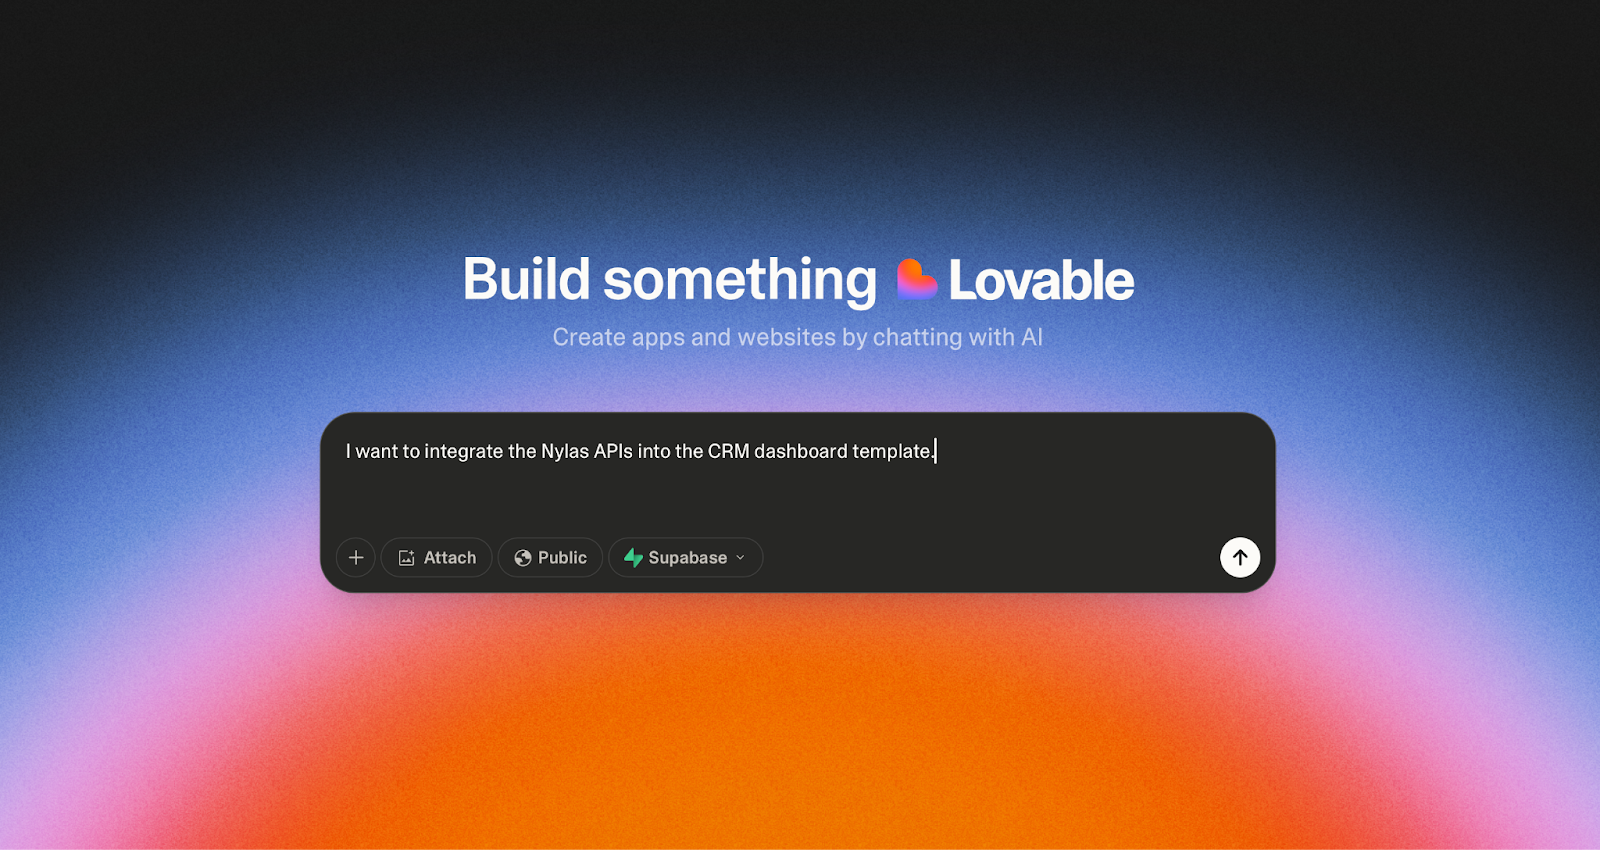
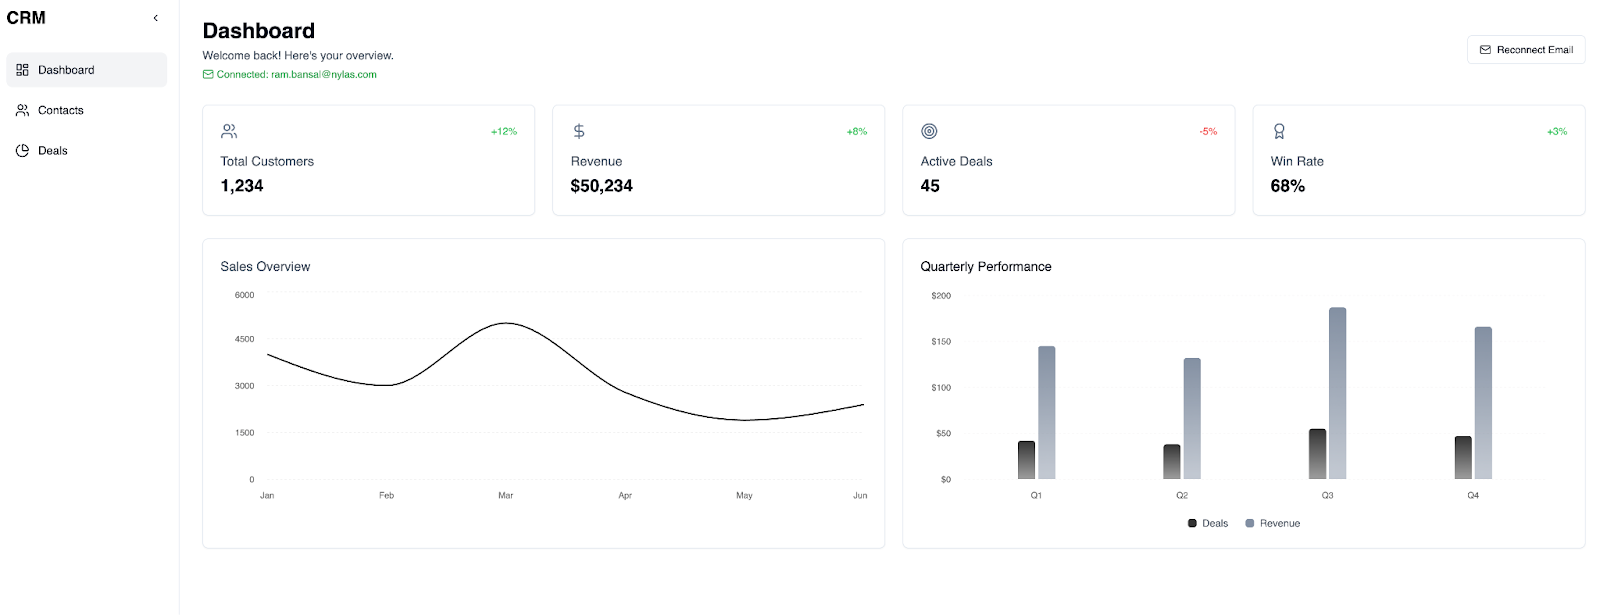
We start from Lovable’s CRM dashboard template, so we’ll focus entirely on the Nylas integration.
Why Pair Lovable with Nylas?
Let’s go over why we should combine Lovable and Nylas:
| Lovable | Nylas |
| Generates React dashboards, backend functions, DB schema | Unified APIs for email, calendars, contacts across Gmail, Outlook & Exchange (+250 providers) |
| Rapid prototyping in minutes | Handles hosted OAuth, webhooks |
| Prompt‑driven & flexible | Production‑ready communication features |
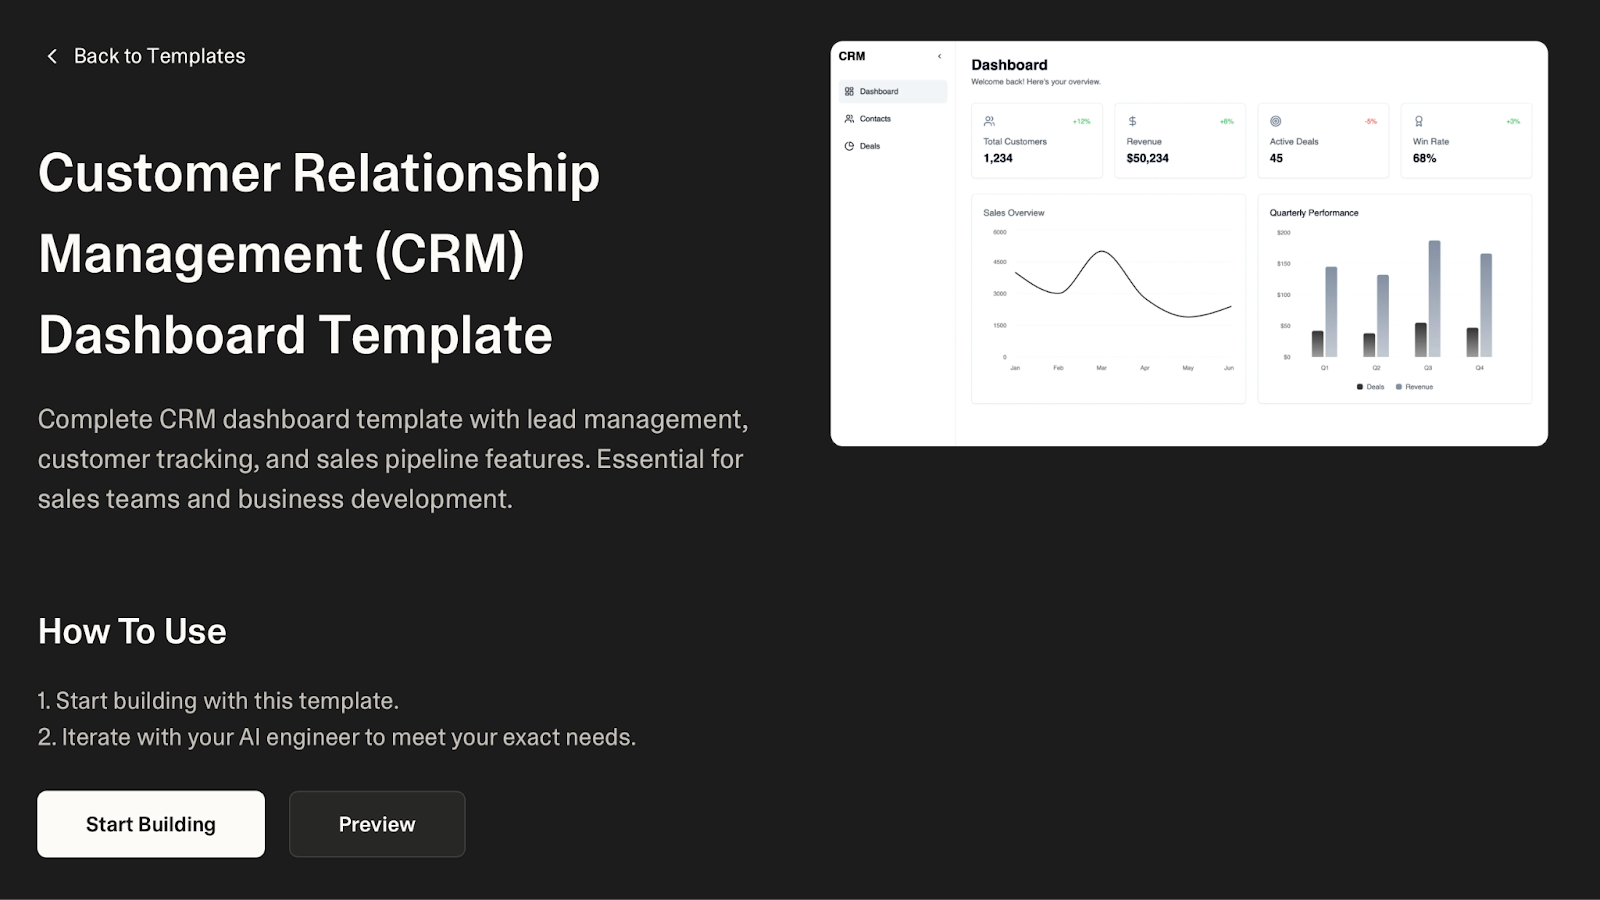
We are going to use a Lovable CRM dashboard template to get us started:
Lovable delivers the frontend functionality; Nylas delivers the communication infrastructure, so you can focus on product features instead of boilerplate.
Integration Steps
Here are the steps we’ll work through using AI prompts to integrate Nylas with Lovable:
1. Connect accounts with Nylas Hosted OAuth.
2. Persist grants in Supabase (grantId + verified user email).
Note: Lovable does not offer database and backend support out of the box, and integrates nicely with Supabase for this.
3. Handle sessions in localStorage. Once a user authenticates with Nylas, we store their email on the frontend for subsequent requests (i.e. sync contacts)
4. Sync contacts with the Nylas Contacts API.
High‑Level Architecture
Before we jump into building, here is an overview diagram:
┌───────────────┐    ┌────────────────┐    ┌──────────────┐
│  Lovable UI   │    │ Supabase Edge  │    │  Nylas API   │
│  (React App)  │────│   Functions    │────│  (v3 SDK)    │
└───────────────┘    └────────────────┘    └──────────────┘
                             │
                    ┌───────────────────┐
                    │ Supabase Postgres │
                    │   nylas_accounts  │
                    └───────────────────┘
Getting Started
To kick off our project, let’s jump into our development environment. Follow these steps to get started:
1. Set Up Lovable: Sign up for Lovable to access the platform.
2. Select CRM Dashboard Template: When you sign up for Lovable, you are presented with a prompt input. Navigate to the templates and select the CRM dashboard template and click Start Building:
We will circle back to building shortly where we modify the initial template using prompts.
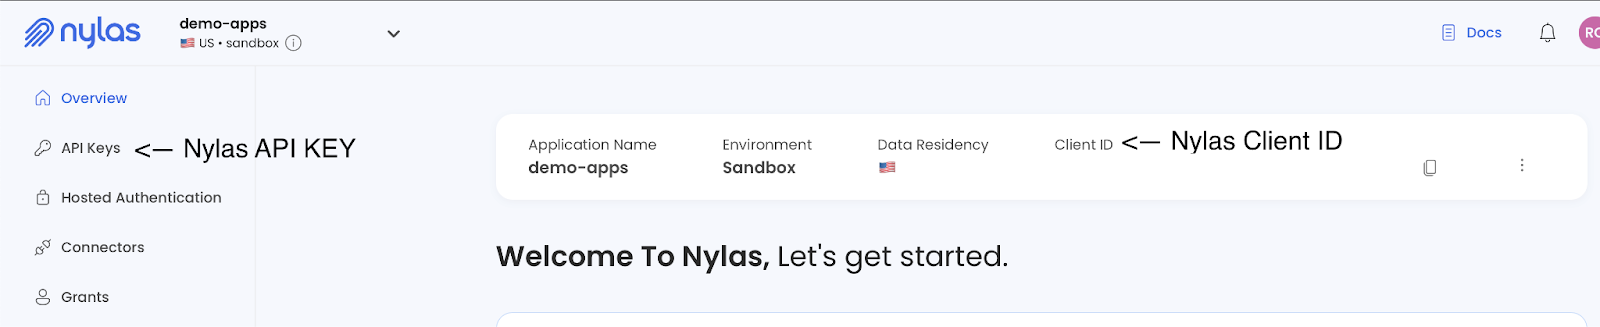
3. Configure Nylas API Credentials: Sign up for a free Nylas developer account and obtain your API keys. As part of building with Lovable, you will be prompted to enter specific credentials as we build. Lovable will help you set up environment variables securely. You’ll need to create an API Key and note the Client ID from the Nylas Dashboard:
For Nylas, if you don’t have an application, consider creating a sandbox app that gives you five connected accounts for free. Important: never commit secrets to source control.
4. Connect to Supabase: Since Lovable focuses on building UI, we will use Supabase for storing information and building backend functionality. Click on the Supabase icon to create and link your Supabase account and project:

Prompt‑Driven Development
Let’s generate a Nylas Contact API integration to use the CRM dashboard template. For each prompt we’ll share potential issues that may come up and what we aim to accomplish for testing purposes later. These prompts are based on the Nylas starter prompts.
Step 1. Project Setup & Requirements
The below shares the project context with Lovable, similar to a Product Requirements Document (PRD) and should not generate any code:
# Project Setup & Requirements
-------------------
**PROJECT CONTEXT**
-------------------
Build a CRM dashboard using Lovable's **nice-crm-dashboard** template with Nylas v3 integration for connecting Google/Microsoft accounts, syncing contacts, and creating new contacts.
--------------
**TECH STACK**
--------------
• **Frontend**: React dashboard UI (Vite) with localStorage sessions
• **Backend**: Supabase Edge Functions (Deno runtime)
• **Database**: Supabase Postgres for persistence
• **Integration**: Nylas Node SDK v3 (grant-ID model ONLY)
• **Authentication**: Nylas Hosted OAuth
--------------------
**HIGH-LEVEL GOALS**
--------------------
1. Install and configure Nylas Node SDK v3 with environment variables
2. Implement hosted OAuth for email account connections
3. Handle user sessions with localStorage and utility functions
4. Store grant IDs and user emails in database using UPSERT
5. Build API endpoints to list and create contacts
6. Update CRM UI with connection status and contact management
-------------------------
**CRITICAL REQUIREMENTS**
-------------------------
• **Never hardcode emails** - Extract real user email from `grant.data.email` after OAuth
• **Use Nylas v3 only** - Grant-ID model, no deprecated v2 access tokens
• **Frontend OAuth callback** - Create `/oauth/callback` route for redirect handling
• **localStorage sessions** - Store connected email on frontend for API calls
• **Database UPSERT** - Handle duplicate grant IDs with `{ onConflict: 'nylas_grant_id' }`
• **API endpoint calls** - Connect button fetches backend endpoint, doesn't navigate
• **Input validation** - Validate connected email exists before Nylas API operations
---------------
**DELIVERABLES**
---------------
Generate complete code, database schema, UI components, and session management for seamless email integration with security best practices.
--------------------
**QUESTIONS & SETUP**
--------------------
Do you have questions about the requirements or tech stack before I share step by step prompts to build? Confirm you have:
- Supabase project and credentials
- Nylas developer account with API keys
Lovable will ask any clarifying questions about the backend environment and Nylas which we can clarify before moving on. For example, you may be requested to set up Supabase before moving forward and ensure you have Nylas credentials ready to add.
Now after responding to the clarifying questions, we are ready to start integrating Nylas.
Step 2. Add Nylas to Your Project
Next, let’s setup the Nylas Node SDK:
# Add Nylas to Your Project
Install the Nylas Node.js SDK (v3) and add dotenv for secure environment variable management:
```bash
npm install nylas dotenv
```
Store environment variables with Nylas credentials:
```env
NYLAS_API_KEY=your-api-key
NYLAS_CLIENT_ID=your-client-id
NYLAS_API_URI=https://api.us.nylas.com   # change to https://api.eu.nylas.com if using EU
```
Load environment variables at startup and initialize the Nylas SDK:
```javascript
import Nylas from "nylas";
import "dotenv/config";
const nylas = new Nylas({
  apiKey: process.env.NYLAS_API_KEY,
  apiUri: process.env.NYLAS_API_URI,
});
```
You will be requested to share Nylas credentials (NYLAS_API_KEY, NYLAS_API_URI, NYLAS_CLIENT_ID). To learn more about setting up authentication, check out our hosted authentication livestream or developer docs.
Now we have set up the Nylas SDK and are ready to integrate.
Step 3. Build the Email Connection Flow
Now, let’s prompt to start authentication from the browser:
# Build the Email Connection Flow
Implement authentication initiation to redirect users to Nylas authentication:
• Update "Connect Email/Contacts" button to fetch `/functions/v1/nylas-auth` backend endpoint
• Create `/functions/v1/nylas-auth` endpoint that generates OAuth URL with required scopes using `nylas.auth.urlForOAuth2()`
• Redirect user's browser to Nylas hosted authentication page
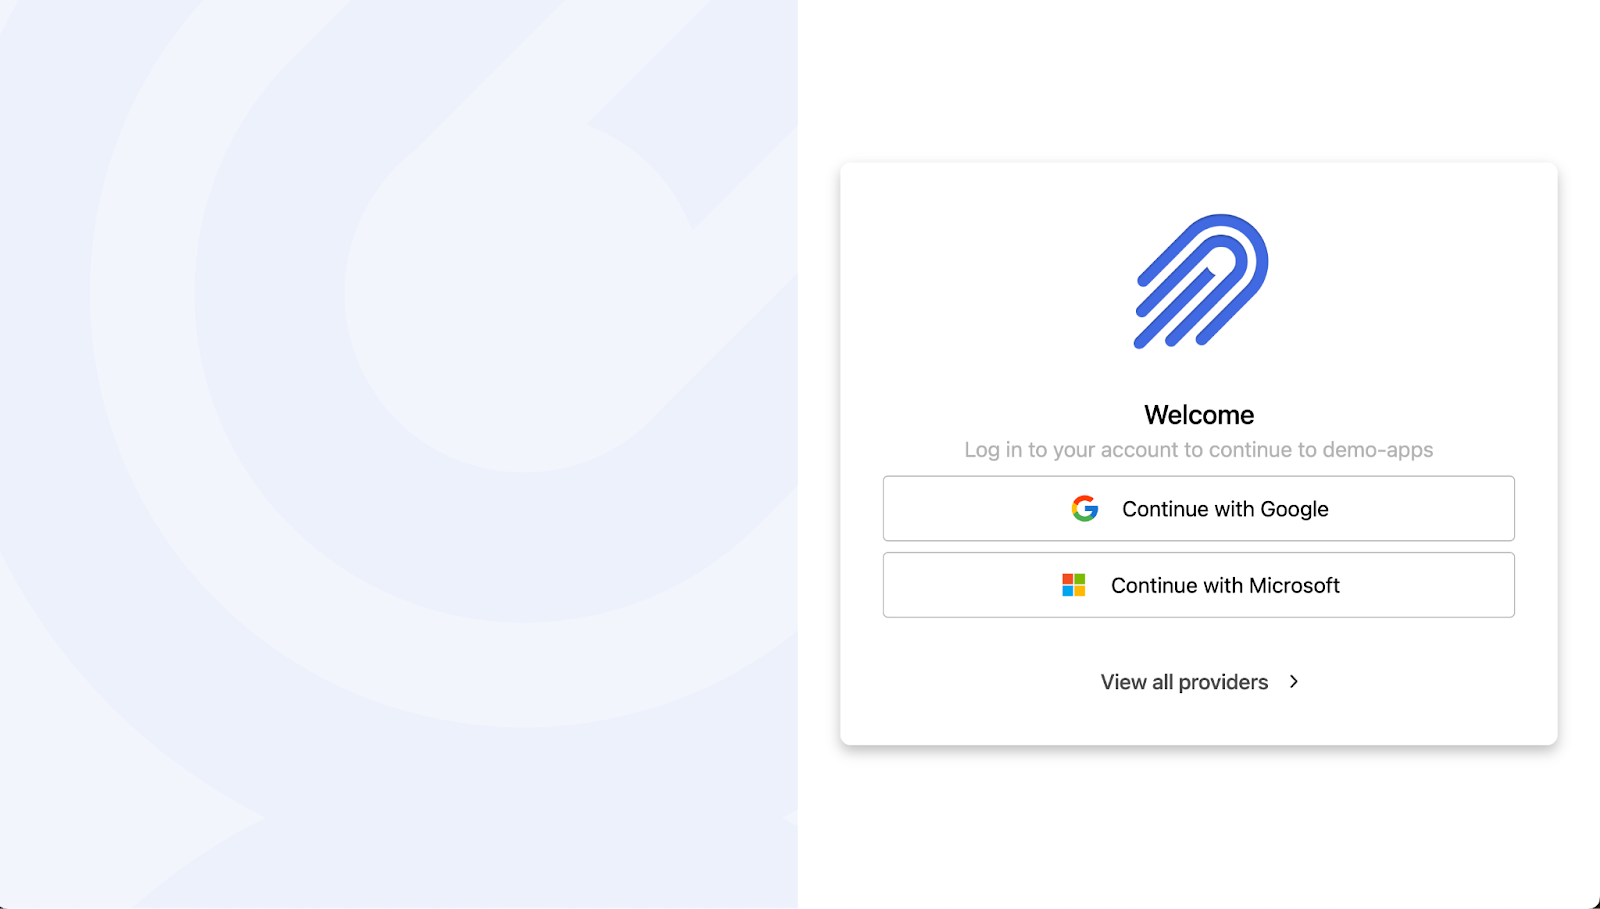
**Notes:** Button should fetch the API endpoint, not navigate directly to a frontend route. User will be redirected to Google/Microsoft for consent.For this step, ensure the endpoint /nylas-auth is treated as a Supabase Edge Function instead of a React route so the backend can generate an authentication URI to redirect the user. During testing, after the user clicks on Connect Email/Contacts they will be redirected to the Nylas Hosted authentication page:
Now, we’ve set up the backend to generate a URL to redirect the user.
Step 4. Handle Authentication Response
Now, let’s receive the callback after the user authenticates. Callback exchanges the code, captures the verified email, and stores user data.
# Handle Authentication Response

Process authentication callback after user completes authentication:

• Create `/functions/v1/nylas-callback` endpoint that exchanges code for grantId and extracts user email from `grant.data.email`
• Store grantId and user email in database using UPSERT operation and return `{ success: true, userEmail }`
• Build `/oauth/callback` frontend page that parses code from URL, calls callback endpoint, stores userEmail in localStorage, and redirects to `/contacts`
• Add route in App.tsx for `/oauth/callback` with loading states and error handling

**Notes:** Always extract email from grant.data.email after OAuth. Use UPSERT to prevent duplicate key errors.
Ensure the code generated is correct to retrieve user email. For example, Lovable may use grant.email instead of grant.data.email which may impact future steps.
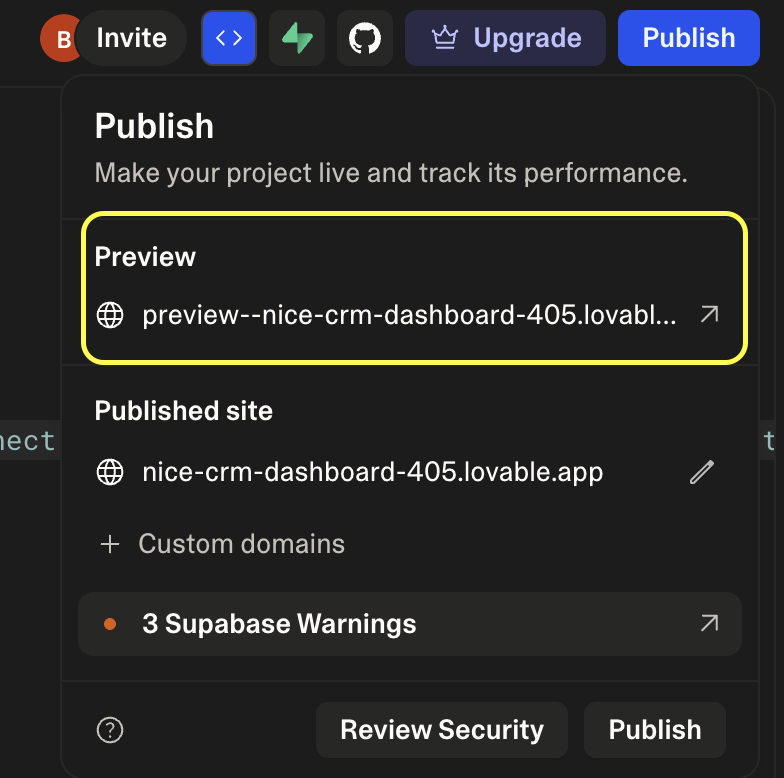
At this step, we are requested to define the NYLAS_REDIRECT_URI. The redirect URI can be defined as lovable preview URL + /oauth/callback, where the preview URL (will be something like https://preview–{APP_NAME}.lovable.app/) can be found by clicking the publish icon:
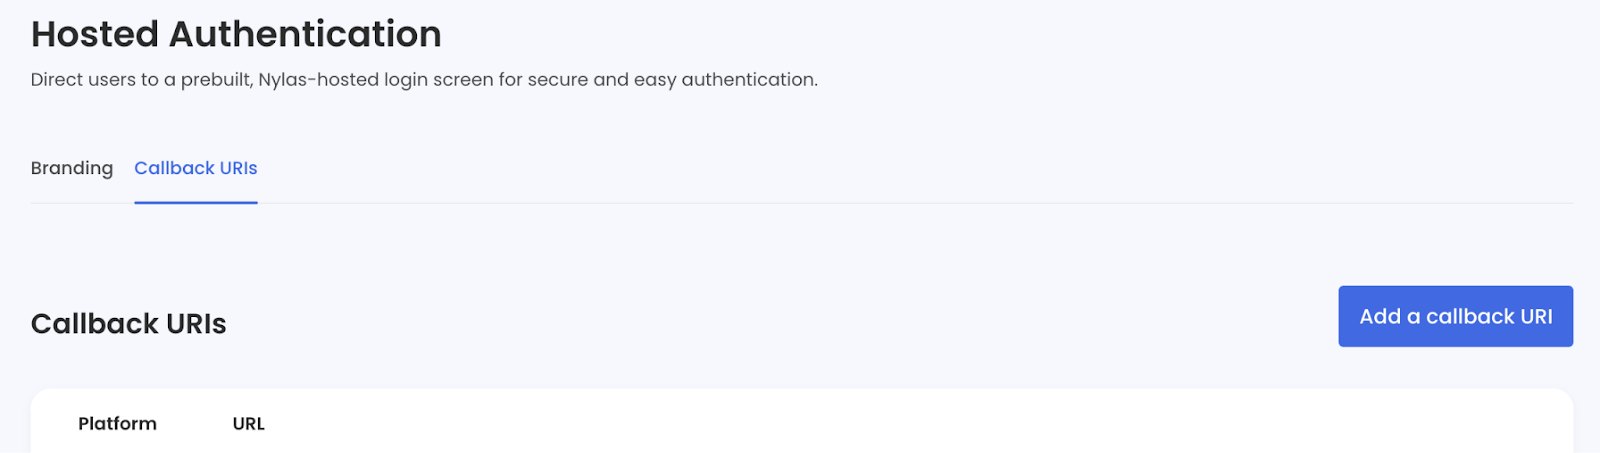
The redirect URI (https://preview–{APP_NAME}.lovable.app/oauth/callback) must be specified on the Nylas dashboard as the callback URI (click Add a callback URI):
Now we have completed the OAuth callback where the user has completed authentication and is redirected to the application and the user grant information is stored on Supabase.
Step 5. Session Utility Helpers
Let’s update the frontend with utility helpers for retrieving and displaying user information. The below helpers share connection state so any component can display banners or gate features:
# Manage User Sessions on Frontend
Create user session management system in `src/lib/auth.ts`:
• Build helper functions: `getConnectedEmail()`, `setConnectedEmail(email)`, `clearConnectedEmail()`, and `isEmailConnected()`
• Update all components to use `getConnectedEmail()` instead of hardcoded emails like '[email protected]'
• Validate email exists before making API calls and display connection status in dashboard
**Notes:** All frontend components should check connection status before attempting Nylas API operations.
Now all frontend components can now use the helper functions.
Step 6. Build Contact Features
Let’s prompt Lovable to create a Supabase edge function to create and read contacts to display them on the frontend under the contacts page:
# Build Contact Features

Create Supabase edge functions for contact management:
• Build `GET /functions/v1/nylas-contacts-list` endpoint that requires `x-user-email` header, looks up grantId in database, and calls `nylas.contacts.list()` with pagination support
• Create `POST /functions/v1/nylas-contacts-create` endpoint that validates request body (givenName, emails), uses grantId to call `nylas.contacts.create()`, and returns new contact details
• Update contacts page UI to fetch and display contact list on load using connected email from localStorage
• Add contact creation form with validation and refresh list after successful creation

**Notes:** Always validate connected email before making Nylas API calls. Include error handling for missing connections and API failures.
In this section, we implemented the Nylas Contact API to display all of the user’s contacts in one place.
How to Test
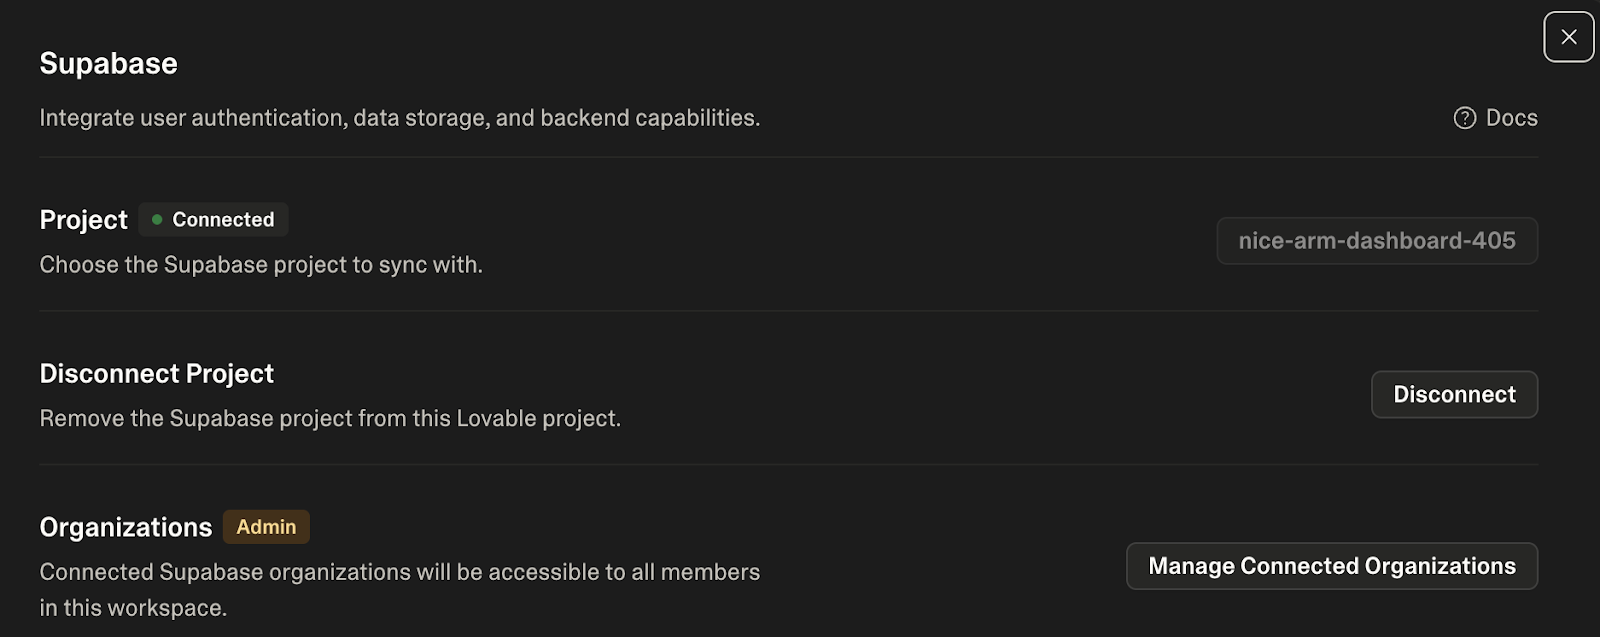
1. Ensure the project functions and database are deployed to Supabase (click on Supabase icon in Lovable to confirm):
2. Ensure environment variables are defined and stored securely:
NYLAS_API_KEYNYLAS_CLIENT_ID,NYLAS_REDIRECT_URINYLAS_API_URI
Note: All keys can be entered via Lovable, however, are stored on Supabase. For security, ensure to review how Supabase stores user information and environment variables.
3. Open the preview URL and click Connect Email/Contact button to complete authentication flow.
4. After completing authentication, visiting the contacts page will list your email contacts. We are able to retrieve and display contacts:

Now we’ve tested that the application can connect to our email provider via Nylas Contact API and display our email contacts.
Build with Nylas
In this post we went over how to start with a Lovable template and integrate the Nylas API including both authentication and Nylas Contact API. If you haven’t already, sign up for a free Nylas developer account to start building.
Here are some next steps and resources to help you continue:
- Get Your Free API Key: Visit the Nylas Dashboard and create a new application.
- AI Prompt quickstart guide: Use our AI prompts to authentication users, integrate email, calendar, and contacts.
- Nylas Documentation: Visit Nylas Docs for detailed guides, SDK references, and code samples.
- Join the Community: Check out the Nylas developer community.
Add email, calendar and contact features to your app – sign up for Nylas, load Lovable, and build with prompts.


