Introduction
We’re excited to announce the launch of the Nylas API v3. To harness the latest capabilities of the Nylas Email API v3, let’s explore how to optimize your email workflow with the TinyMCE Rich Text Editor.
A rich text editor provides users with a visually appealing interface for text editing, formatting, hyperlinking, and inserting media. Complementing the email capabilities of the Nylas Email API, TinyMCE serves as a robust tool for enhancing email composition.
In this blog post, we’ll dive into the development of email messaging functionality using the TinyMCE Text Editor and the Nylas SDK. Follow along with code samples as we streamline your email workflow with these powerful tools!
TinyMCE Rich Text Editor
TinyMCE is a What You See Is What You Get (WYSIWYG) text editor that seamlessly integrates into any tech stack, providing developers with full control over code, UI, configurations, and integrations. Utilizing TinyMCE enables non-technical end users to create, manage, and modify email content.
TinyMCE uses familiar web user interfaces to ensure a smooth text editing experience. The text editor configured for email in TinyMCE offers robust templates, editable regions, and personalized content options to optimize email campaigns without coding skills. With TinyMCE, users can unleash creativity and reader engagement.
Customizing TinyMCE for email workflow using plugins
TinyMCE boasts a growing plugin ecosystem, empowering developers to customize their email workflows. Developers can leverage plugins to tailor the editor, adding advanced formatting options, multimedia embedding, and seamless integration with third-party services.
TinyMCE plugins offer versatile solutions for email composition, whether it’s inserting personalized merge tags, streamlining content creation with templates, or ensuring error-free copy-paste. TinyMCE’s plugin ecosystem equips users with the tools to customize and optimize email workflows.
In this blog post, we’ll focus on the following initial plugins to kickstart TinyMCE as your communication text editor:
autolink: automatically add links to web urlsimage: allows for embedding imagesinlinecss: ensures CSS is inline when sending HTML over emaillists: creation of liststable: creation of tables
We also recommend exploring and adding the following plugins as part of setting up your initial email workflow: help, tinymcespellchecker, a11ychecker, autocorrect, link.
It’s important to note that this is a starting plugin configuration for setting up TinyMCE as your email editor; future blog posts will explore more advanced plugins. The following section will outline the steps for adding TinyMCE to your application configuration.
Integrating TinyMCE with Nylas Email API
The Nylas Email API offers robust email functionality, including sending, tracking, and synchronization, making it an ideal complement to TinyMCE. Integrating TinyMCE with the Nylas Email API allows users to harness the collective capabilities of a robust text editor and a comprehensive email platform. This section presents a step-by-step guide on integrating TinyMCE with the Nylas Email API.
We will be updating a working application utilizing the Nylas Node SDK on the backend and React on the frontend. The setup instructions for the backend and frontend are part of the GitHub repository (./frontend/readme.md and ./backend/readme.md).
In this section, let’s add TinyMCE as our email editor, effectively replacing an HTML <textarea> with the TinyMCE <Editor> React component. The first step is to install TinyMCE:
npm i @tinymce/tinymce-react
Ensure you have the latest version of TinyMCE compatible with all plugins.
Next, let’s open the frontend/src/SendEmails.jsx file and import the TinyMCE <Editor> component:
// frontend/src/SendEmails.jsx
import { useNylas } from '@nylas/nylas-react';
import React, { useState, useEffect } from 'react';
import PropTypes from 'prop-types';
import IconDelete from './components/icons/IconDelete.jsx';

// Import <Editor> component from tinymce-react
import {Editor} from '@tinymce/tinymce-react';
The Editor component has a prop called onEditorChange where we can track the latest updates and store the details in state, so let’s setup the useState hook to track the email body:
// frontend/src/SendEmails.jsx
...
const [value, setValue] = useState('');

// component render
return (
...
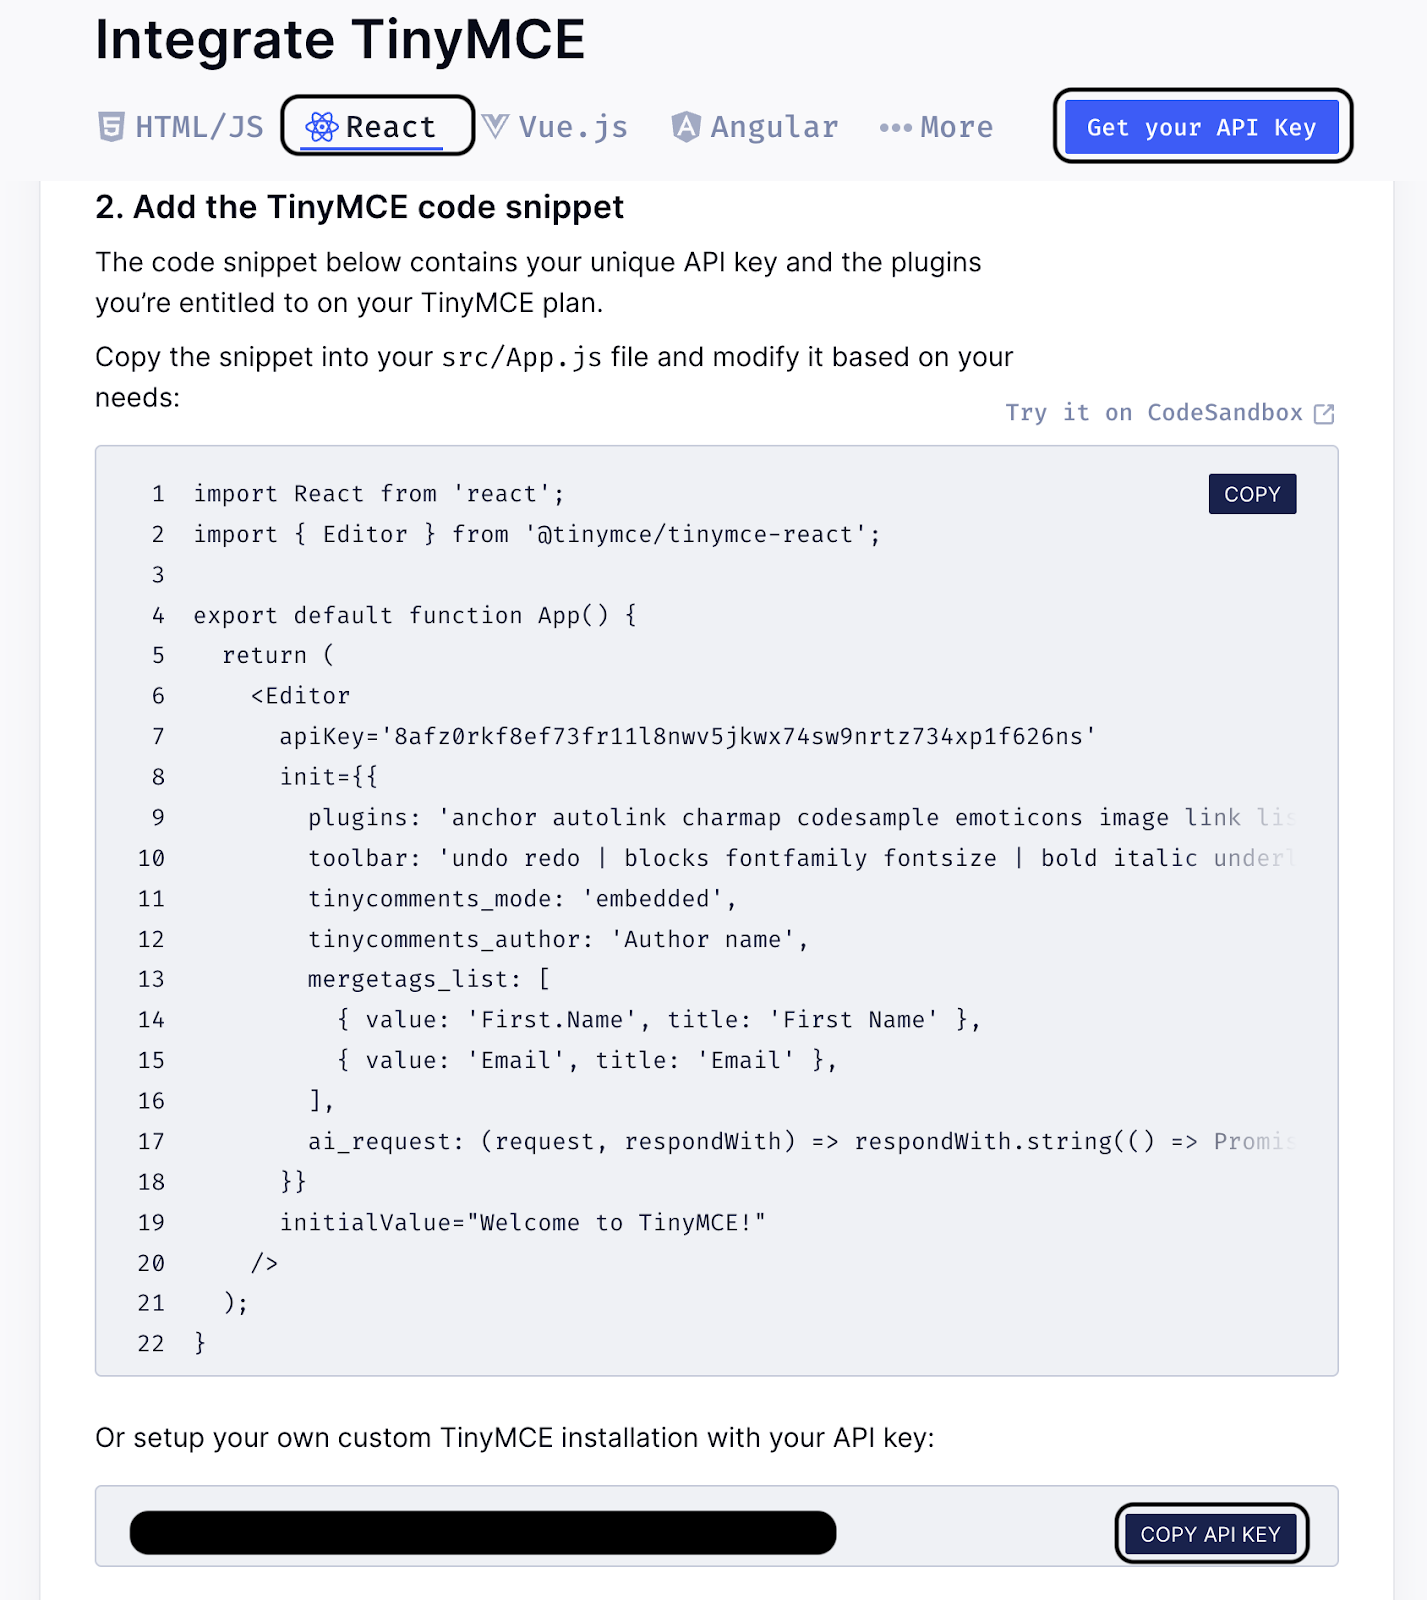
Before we continue, ensure you’ve signed up for TinyMCE for free, so you can retrieve your API key to access the available plugins. The API key, referenced as TINY_MCE_API_KEY below, will be available on the TinyMCE dashboard:
Lastly, let’s swap the <textarea> component with the TinyMCE <Editor> component to the SendEmail.jsx file:
// frontend/src/SendEmails.jsx
...
  </div>
  {/* Swap <textarea> with <Editor> */}
  <Editor
      plugins={['autolink', 'image', 'inlinecss', 'lists', 'table']}
      initialValue={initialValue}
      value={value}
      onEditorChange={(newValue) => {
         setValue(newValue)
         setBody(newValue)
      }}
      apiKey='<TINY_MCE_API_KEY>'
      style={{ p: { margin: 0 } }}
   />
  <div className="composer-button-group">
...
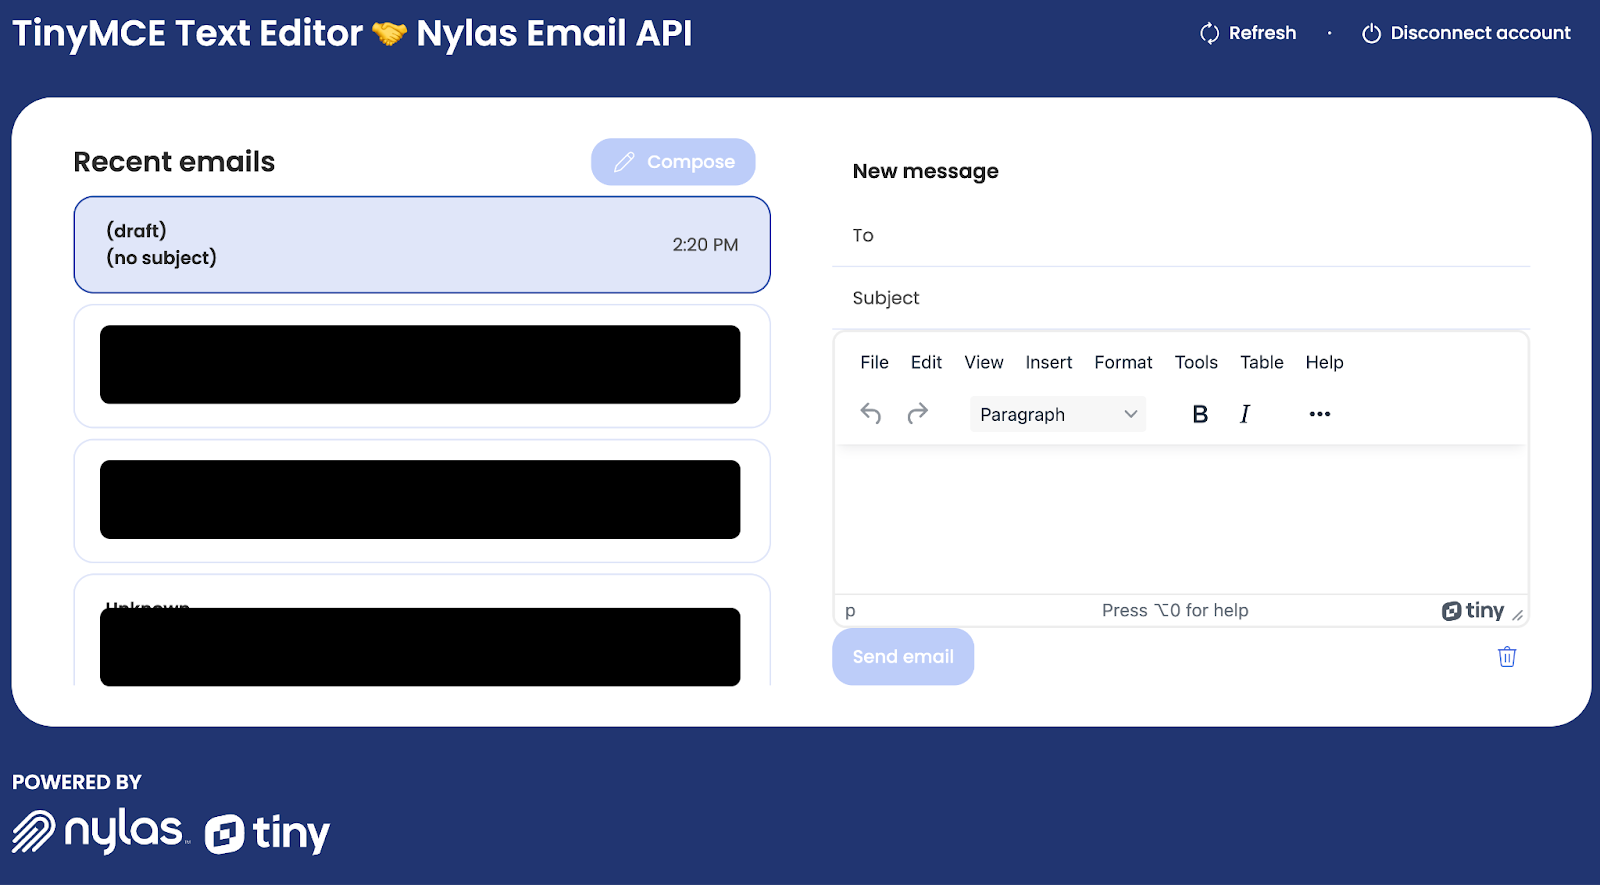
Now we’ve swapped our <textarea> HTML component with TinyMCE’s Rich Text Editor:
In this section, we added the TinyMCE Text Editor into our email workflow powered by the Nylas Email API.
Build time!
In this blog post, we explored enhancing the user’s messaging experience by integrating the TinyMCE Text Editor with the Nylas Email APIs.
With TinyMCE, developers can create engaging email workflow UIs that seamlessly integrate into any tech stack. Additionally, TinyMCE empowers non-technical users to effortlessly create and manage email messaging workflows within your application.
The release of the Nylas API v3 introduces new features and functionality to the email landscape. By unlocking email data, products and developers can innovate and deliver new experiences, empowering their users.
You can sign up for TinyMCE and Nylas for free and start building! To continue building with Nylas, explore various quickstart guides or visit the Nylas developer documentation.
 Email and Contacts API
  Calendar API & Scheduler
  Notetaker API
  Agent Accounts


